如何开发一个iOS APP
导读
如何开发一个APP,本文将以《西瓜翡翠》APP,一常见商业型APP进行表述自己的见解,希望有不同意见的请私聊。
第一步,划分模块
作为一个开发者,我们首先要知道自己将要做一个什么样子的APP,就得通过UI的设计来知道这一情况。
一般来说,我们可以根据UI的页面来确定需要做多少的页面。
而本文,我将以这个《西瓜翡翠》APP的页面来划分模块,至少26+。
为什么是26+?
实际上我只会分析的去做这26个页面,理由是在线客服没有兴趣,都是套第三方的,虽然也做过自定义的UI;接着就是我不打算自己进行交易获取知道订单的样式、订单详情的样式、还有交易的其他样式,所以我计划只搞26个简单的页面。

第二步,构建测试
由于通过第一步,我们已经知道需要制作多少模块页面了。
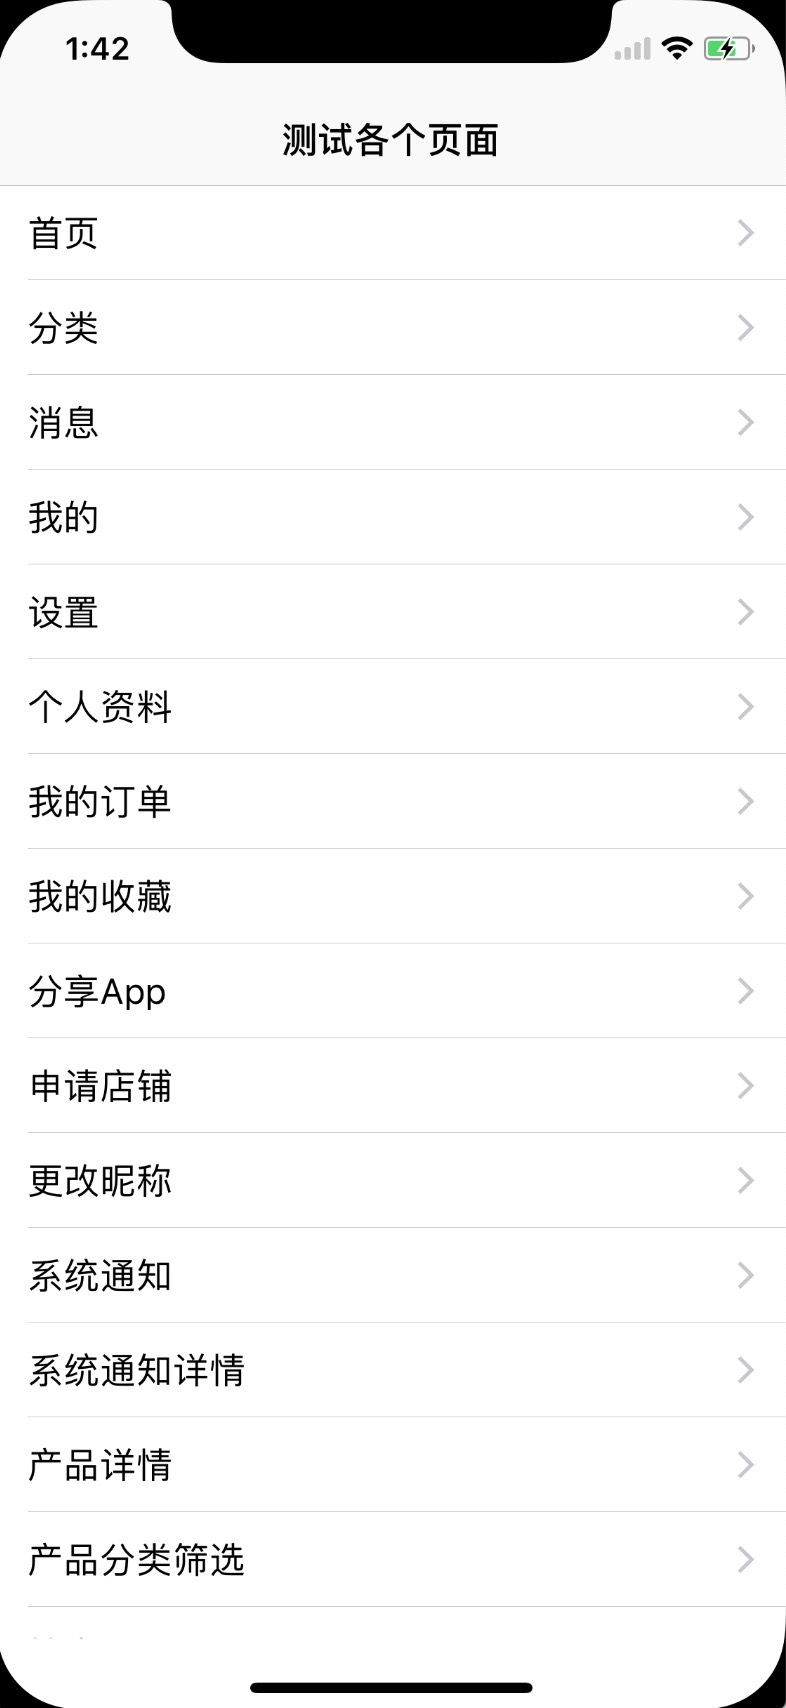
接下来,我们要构建一个测试页面,通过点击测试页面进入到对应的页面里面,方便测试。
代码:
- (NSArray *) tableViewDataSource {
    if (_tableViewDataSource) {
        return _tableViewDataSource;
    }
    NSMutableArray *keepArray = [NSMutableArray array];
    {
        [keepArray addObject:[self dictionaryWithName:@"首页" VC:@"YCHomeVC" param:nil]];
    }
    {
        [keepArray addObject:[self dictionaryWithName:@"分类" VC:@"YCClassificationVC" param:nil]];
    }
    {
        [keepArray addObject:[self dictionaryWithName:@"消息" VC:@"YCMessageVC" param:nil]];
    }
    {
        [keepArray addObject:[self dictionaryWithName:@"我的" VC:@"YCMineVC" param:nil]];
    }
    {
        [keepArray addObject:[self dictionaryWithName:@"设置" VC:@"YCSettingVC" param:nil]];
    }
    {
        [keepArray addObject:[self dictionaryWithName:@"个人资料" VC:@"YCPersonalInformationVC" param:nil]];
    }
    {
        [keepArray addObject:[self dictionaryWithName:@"我的订单" VC:@"YCMyOrderVC" param:nil]];
    }
    {
        [keepArray addObject:[self dictionaryWithName:@"我的收藏" VC:@"YCMyCollectionVC" param:nil]];
    }
    {
        [keepArray addObject:[self dictionaryWithName:@"分享App" VC:@"YCShareAppVC" param:nil]];
    }
    {
        [keepArray addObject:[self dictionaryWithName:@"申请店铺" VC:@"YCApplyForStoreVC" param:nil]];
    }
    {
        [keepArray addObject:[self dictionaryWithName:@"更改昵称" VC:@"YCChangeNicknameVC" param:nil]];
    }
    {
        [keepArray addObject:[self dictionaryWithName:@"系统通知" VC:@"YCSystemNotificationVC" param:nil]];
    }
    {
        [keepArray addObject:[self dictionaryWithName:@"系统通知详情" VC:@"YCSystemNotificationDetailVC" param:nil]];
    }
    {
        [keepArray addObject:[self dictionaryWithName:@"产品详情" VC:@"YCProductDetailVC" param:nil]];
    }
    {
        [keepArray addObject:[self dictionaryWithName:@"产品分类筛选" VC:@"YCProductClassificationFilterVC" param:nil]];
    }
    {
        [keepArray addObject:[self dictionaryWithName:@"搜索页" VC:@"YCSearchVC" param:nil]];
    }
    {
        [keepArray addObject:[self dictionaryWithName:@"搜索产品筛选" VC:@"YCSearchProductFilterVC" param:nil]];
    }
    {
        [keepArray addObject:[self dictionaryWithName:@"确认订单" VC:@"YCConfirmOrderVC" param:nil]];
    }
    {
        [keepArray addObject:[self dictionaryWithName:@"资讯详情" VC:@"YCInformationDetailsVC" param:nil]];
    }
    {
        [keepArray addObject:[self dictionaryWithName:@"账号安全" VC:@"YCAccountSecurityVC" param:nil]];
    }
    {
        [keepArray addObject:[self dictionaryWithName:@"更改密码" VC:@"YCChangePasswordVC" param:nil]];
    }
    {
        [keepArray addObject:[self dictionaryWithName:@"我的收货地址" VC:@"YCMyShippingAddressVC" param:nil]];
    }
    {
        [keepArray addObject:[self dictionaryWithName:@"添加修改我的收货地址" VC:@"YCAddEditMyShippingAddressVC" param:nil]];
    }
    {
        [keepArray addObject:[self dictionaryWithName:@"意见反馈" VC:@"YCOpinionFeedbackVC" param:nil]];
    }
    {
        [keepArray addObject:[self dictionaryWithName:@"关于我们" VC:@"YCAboutUsVC" param:nil]];
    }
    {
        [keepArray addObject:[self dictionaryWithName:@"简介" VC:@"YCIntroductionVC" param:nil]];
    }
    _tableViewDataSource = keepArray;
    return _tableViewDataSource;
}

第三步,编写UI
UI,是体验你的成果的唯一可视化的结果。
有很多人不知道你到底做了什么惊天动地的事情,他们唯一的检验指标就是看看你的UI。
有很多时候,UI先出,而服务器那方面也不一定跟的上速度,所以我的建议是,先不要管服务器的数据,自己先写个UI出来吧,可以用随机数据来检验你的UI效果。
编写UI 方面,我建议从最通用的UIView开始构建,不要从UIViewController 带个XIB 开始搞起,也不要从TableViewCell、CollectionViewCell 那里的XIB搞起,因为都不通用。
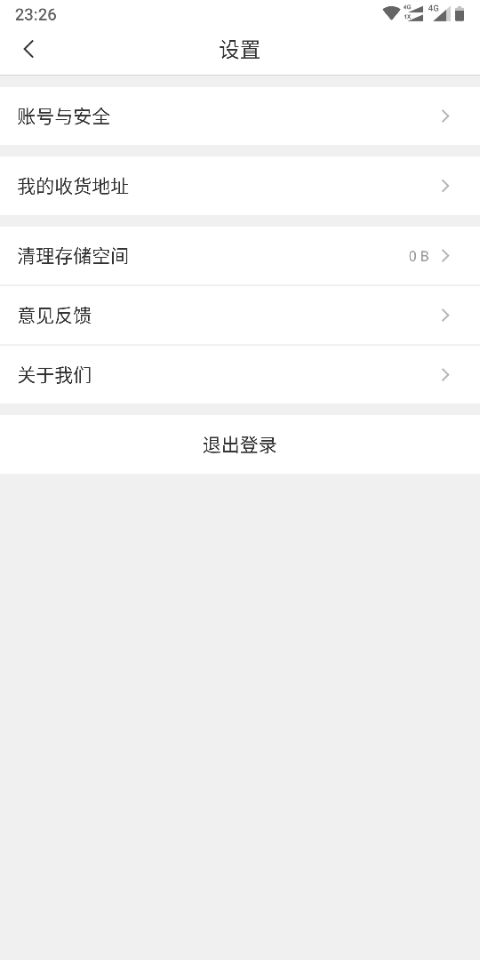
3.1.编写【设置】页面
实现上图看看【设置】页面的效果。

一个中规中矩的界面设计。
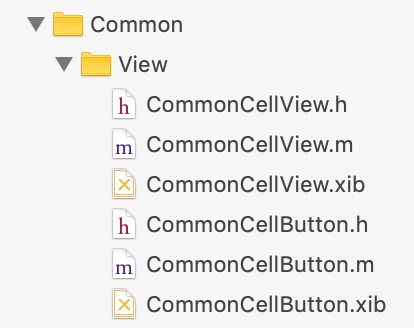
在我看来就是一些UIView的构成,所以我就写了两个UIView类来实现这个效果。

然后创建 【设置】页面的 UIViewController,基于最新设计的 LQSFixController,下面是具体代码:
#import "YCSettingVC.h"

#import "CommonCellView.h"
#import "CommonCellButton.h"

@interface YCSettingVC ()

@property(nonatomic,strong) CommonScrollView2 *scrollView;

@end

@implementation YCSettingVC

- (void)viewDidLoad {
    [super viewDidLoad];
    // Do any additional setup after loading the view.

    self.title = @"设置";

    self.view.lqs_backgroundColor = @"#eeeeee";

    self.fixView.body = self.scrollView;
}

- (NSArray *) contentWithItems {
    NSMutableArray *array = [NSMutableArray array];
    {
        CommonCellView *view = [CommonCellView viewWithTitle:@"账号与安全"];
        LQSViewItem *item = [LQSViewItem itemWithView:view height:50];
        item.inset = UIEdgeInsetsMake(8, 0, 0, 0);
        [array addObject:item];
    }
    {
        CommonCellView *view = [CommonCellView viewWithTitle:@"我的收货地址"];
        LQSViewItem *item = [LQSViewItem itemWithView:view height:50];
        item.inset = UIEdgeInsetsMake(8, 0, 0, 0);
        [array addObject:item];
    }
    {
        CommonCellView *view = [CommonCellView viewWithTitle:@"清理存储空间"];
        LQSViewItem *item = [LQSViewItem itemWithView:view height:50];
        item.inset = UIEdgeInsetsMake(8, 0, 0, 0);
        [array addObject:item];
    }
    {
        CommonCellView *view = [CommonCellView viewWithTitle:@"意见反馈"];
        LQSViewItem *item = [LQSViewItem itemWithView:view height:50];
        item.inset = UIEdgeInsetsMake(1, 0, 0, 0);
        [array addObject:item];
    }
    {
        CommonCellView *view = [CommonCellView viewWithTitle:@"关于我们"];
        LQSViewItem *item = [LQSViewItem itemWithView:view height:50];
        item.inset = UIEdgeInsetsMake(1, 0, 0, 0);
        [array addObject:item];
    }
    {
        CommonCellButton *view = [CommonCellButton viewWithTitle:@"退出登录"];
        LQSViewItem *item = [LQSViewItem itemWithView:view height:50];
        item.inset = UIEdgeInsetsMake(8, 0, 0, 0);
        [array addObject:item];
    }

    return array;
}

#pragma mark - 懒加载
- (CommonScrollView2 *) scrollView {
    if (_scrollView == nil) {
        _scrollView = [CommonScrollView2 new];
        _scrollView.items = [self contentWithItems];
    }
    return _scrollView;
}

@end
这个时候,假如你说,不对啊,“清理存储空间”可是有其他数据展示啊。
关于这个问题,可以用以下方式解决:
创建一个 LQSUICustodian 属性对象,用来监听对象。
@property(nonatomic,strong) LQSUICustodian *custodianLabel;
如下绑定:
{
    CommonCellView *view = [CommonCellView viewWithTitle:@"清理存储空间"];
    self.custodianLabel = [LQSUICustodian custodianWithView:view.rightLabel];

    LQSViewItem *item = [ LQSViewItem itemWithView:view height:50];
    item.inset = UIEdgeInsetsMake(8, 0, 0, 0);
    [array addObject:item];
}
测试:
dispatch_after(dispatch_time(DISPATCH_TIME_NOW, (int64_t)(1 * NSEC_PER_SEC)), dispatch_get_main_queue(), ^{
    self.custodianLabel.text = @"6.66MB";
});
点击界面,如何触发对应的事件:
CommonCellView *view = [CommonCellView viewWithTitle:@"我的收货地址"];
view.didSelectBlock = ^(CommonCellView *view) {
    [[CommonVCManager shared] pushVC:@"YCMyShippingAddressVC" param:nil];
};
LQSViewItem *item = [LQSViewItem itemWithView:view height:50];
item.inset = UIEdgeInsetsMake(8, 0, 0, 0);
[array addObject:item];
还有其他方案,就说这种吧,够直观的。
第四步,数据请求
UI结束后,是时候请求数据了。
